Hackers have targeted New Zealand business owners and it’s becoming more and more common in 2019. We have recently heard of a number of businesses, both large and small who have been hacked and had tens of thousands of dollars stolen as a result. Fortunately, none of these businesses have been our clients but the situation is serious enough and common enough at present in New Zealand that we thought it important to write a blog article to alert business owners about the issue and to provide a set of tips that may help to prevent it happening in the first place.
A recent Stuff (www.stuff.co.nz) article relating to the experience of established clothing brand, White Chalk, in Marlborough is just one of many instances where a business Facebook account has been hacked and hackers replaced the owner’s paid advertising with illegal adverts.
Scammers check to see if a business has a credit card loaded in the system for running Facebook Ads or ‘Boosting Posts’ and then they do their own advertising for their own products, often running ads in other parts of the world and sending people to their own dodgy websites. The owner of the Facebook account then gets the bill for all the illegal advertising.
While Facebook will do their best to step in and assist if you discover this issue, which does take time, potentially several weeks. While Facebook work to secure the account and restore safe access to the correct owner, they may place the account on hold while the fraud is investigated which means all marketing has to cease during this period. This can cause loss of momentum and business, not to mention the time and stress to sort it all out.
So how do we stop the scammers in their tracks?
Here are some steps to prevent this happening to your business account
1. Set a limit on your Facebook Ads manager account so if you are hacked, it limits how far criminals can go.
Here are the instructions Facebook currently provides for setting an Account Spending Limit:
To create an account spending limit:
1. Go to your Payment Settings in Facebook Ads Manager.
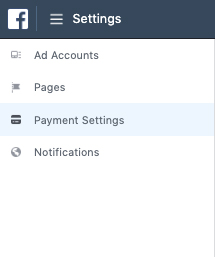
2. In the Set Your Account Spending Limit section, click Set Account Spending Limit.
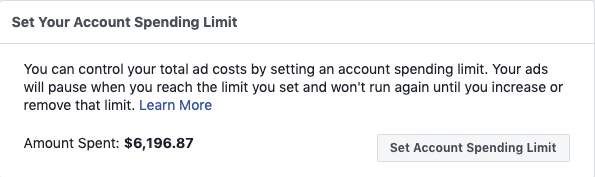
3. Enter the limit you’d like to use.
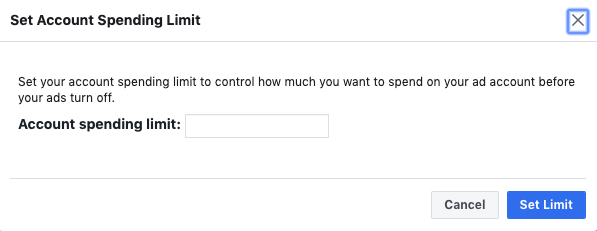
4. Click ‘Set Limit’
Your account spending limit is set and you can now start tracking how much you spend toward your limit as you run ads.
- Note that an account spending limit can’t be set up for accounts based on ‘manual payments’.
- Because an account spending limit is a limit on how much your ad account can spend on all your campaigns over its lifetime, the amount you’ve spent toward it won’t reset automatically after a certain amount of time (like at the end of the month). To keep advertising after you’ve reached your limit, you can either update your limit or reset the amount spent toward it to $0 . It’s important to note that the account spending limit is not related to your ‘monthly media budget’, rather it is simply a cap on the total you are able to spend before you increase or review the limit.
- Once you reach your account spending limit, all ads will stop running so unless you have a huge media spend, it’s probably worth making the limit enough to cover the account spend for at least a month if possible.
- *Please note that if a hacker accesses your account with Administrative user permissions (using an Administrator’s access), then specifying a limit will not protect you as they would be able to change/increase the limit.
2. Set up 2-Factor Authentication in your Facebook Ads account.
Two-factor authentication is a security feature that helps protect your Facebook account in addition to your password. If you set up two-factor authentication, you’ll be asked to enter a special login code or confirm your login attempt each time someone tries accessing Facebook from a computer or mobile device we don’t recognise. You can also get alerts when someone tries logging in from a computer Facebook doesn’t recognise.
Turn on or manage two-factor authentication:
- Go to your Security and Login Settings by clicking the blue dropdown icon (far right in the image below) in the top right corner of Facebook and clicking Settings > Security and Login.
2. Scroll down to Use two-factor authentication and click Edit
3. Choose the authentication method you want to add and follow the on-screen instructions.
4. Click ‘Enable’ once you’ve selected and turned on an authentication method.
There are several two-factor authentication methods you can use with your Facebook account when logging in from an unrecognised computer or mobile device. Here’s how to get started with two-factor authentication, choose either:
- Text message (SMS) codes from your mobile phone.
- Login codes from a third party authentication app.
You’ll need to have at least one of these set up in order to use two-factor authentication. Once you have added either text message (SMS) codes or a third party authentication app on your account, you’ll also be able to set up some of the optional methods below:
- Approving your login attempt from a device we recognise.
- Provide one of your recovery codes.
- Tapping your security key on a compatible device.
- If you haven’t saved the computer or mobile device you’re using, you’ll be asked to do so when you turn on two-factor authentication. This way you won’t have to enter a security code when you log in again. Don’t click Save this browser if you’re using a public computer that other people can access (example: a library computer).
3. Set Up Security Alerts for Peace of Mind
In the same area; ‘Settings, Security and Login’ as outlined above, you can also turn on the ability to receive security alerts if someone logs into your account.
- Go to Get alerts about unrecognised logins and click Edit.
- Choose where you want to receive your alerts, such as from your email account or with a Facebook notification from a recognised device.
- Click Save Changes.
4. Check your Account Regularly
Regularly check your Ad Account for spend values, performance and ads. Don’t be fooled by your Campaign, Adgroup and Ad Set names. Hackers will often follow the same naming protocol that you are using to disguise their illegal activity. It is therefore important to check the destination URL’s (website address your ads send people to) on all your Ads.
5. Be careful when clicking on links in emails
….even if they appear to have come from a friend or colleague.
Avoid Emails, texts, or calls asking you to ‘login’ or “verify” your account or details – don’t respond or click on any links in the communication, even if it looks like it’s from a real organisation or someone you know.
The following link takes you to a great article by the Ministry of Business (NZ Govt) on avoiding scams and fraud and is well worth a read: NZ Government Article on Security.
As Kiwis lost 33 million to online scammers and fraud last year (triple the amount stolen in 2017), this is a problem we all need to take seriously.
6. Account Security Checklist by Facebook
Lastly, here’s a good list from Facebook about keeping your Account Secure: Facebook Security Tips
We wish you all the best with navigating the security features on Facebook and with avoiding the latest hacking trend.
Should you need assistance, feel free to contact us. All the best, Jill & the team at Conversion Marketing.